The Cake Shoes were one of the easier and more fun props/costumes to make. It’s relatively inexpensive to do on your own, and honestly doesn’t require much art skill. I’ve seen these sold by several companies for several hundred dollars, we did these for under $100 with all materials, and it could easily be amended in color and style to mimic your favorite flavor.
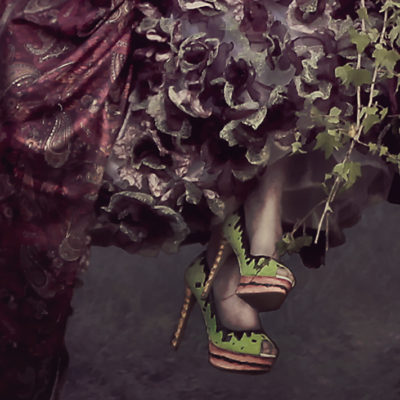
These Tutorials are meant to have everything you need. Click on the images below and they’ll take you right to the Amazon link to buy anything you need and don’t have. Below the item list are the instructions with photographs to follow along. When we do the video tutorial, I’ll add that to the bottom and our YouTube Channel as well! Happy Creating!
Materials Needed
Platform Heel Shoes: $19.99
Hot Glue Gun & Sticks: $9.60
Artist Palette Knife: $6.38
Assorted Artist Brushes: $13.95
Acrylic Heavy Body Titanium White: $10.74
Acrylic Heavy Body Vivid Lime Green: $8.26
Acrylic Heavy Body Burnt Sienna: $5.79
Acrylic Heavy Body Naples Yellow: $10.94
Acrylic Heavy Body Alizarin Crimson: $8.46
Total Cost: $94.11
Selecting the Shoes
It can not be a patent leather or other glossy type surface! You want a soft cloth texture to the shoe so that the color can seep in, and the paint has something to hold onto.
Shoes
I couldn’t find the exact pair I used for the shoot now that it’s two years later. Basically, you’re looking for a platform heel, these ones I choose for the glitter texture, and the chunky heel, for those of you who may not be thin heel kinda gals {or guys} (you can click on the photo to go buy this exact pair.) The pair I found had the glitter texture on the bottom platform only, and was closer in shape to the second ones next to this.
Shoes
These ones were my second option, they have the right shape and style, minus the glitter texture, which you could add yourself to the bottom platform and heel if you like. They’re a little thinner on the heel. (You can click on the photo to purchase.) Otherwise you can go to your favorite shoe store and buy a pair you love. I recommend the platform sole, and that you keep the color in the beige to white color scheme.
Acrylic Paint: Liquidex Heavy Body.
There’s a lot of options when it comes to paints and brushes. (You can click the photo to buy the right kind, don’t forget to select your colors! They’re listed above.) I personally like the Liquidex Brand of paints which aside from online purchase, you can get at places like DickBlick, AC Moore, and Hobby Lobby. The Heavy Body allows for a thicker paint that gives the more icing feel we’re after. (Feel free to stray from the mint chocolate chip… maybe you’re more of a chocolate cherry kind of gal, or a Lemon Merengue.)
Acrylic Artist Brushes
You’ll want an angled flat brush, a pointed small detail brush, and a general flat brush at minimum. If you are like me and work through brushes quickly, the photo goes to a set of 72 brushes in those sizes so you can replace them, (Just click the photo to head to Amazon). Otherwise you can buy them in a smaller set HERE. Like everything else you can buy a quality brush that will last you a good while or throw away brushes. It depends on how diligent you are with caring for and cleaning them, which will better serve you. Nothing worse than dropping $20-35 on a single brush, and ruining it because you left it on the palette instead of cleaning it that night.
Things I Had On Hand That You Might Not
There are a few other things that I have had in my studio for years and use on every project, those are included and linked below in case you're just getting started on your artistic journey.
Artist Brush Washer & Holder
I have had mine since high school, it’s simple and it works. It holds all your brushes suspended above the water to dry, or in the water, where they can rinse, but the bristles don’t get ruined from sitting flat against the bottom. A lot of times I’m working with multiple brushes and this little $10 item was an awesome investment.
Clear Acrylic Artist Palette
Not that you could tell anymore, but years ago when I first got mine, I was still in middle school and it was completely clear. I remember thinking it was glass, and this was the Artist’s version of Cinderella’s glass slippers. I loved it, and cleaned it meticulously… now it has nearly 2 decades of paint on it, and has itself become a work of art. But this is the size and type I’d get if I needed to replace it.
Watercolor Pencils
I learn a lot by making mistakes and experimenting. I used artist sketch pencils in creating the original shoes, and the graphite showed through the paint on the heel. In hindsight I’d highly recommend, and in the future myself will be utilizing watercolor pencils, that way any color that did show would be similar to the paint color, and it’ll dissolve naturally with the water on the brush. I love this set for the quality and the box case.
Artist Palette Knife
A palette knife can be key for texture… this set particularly (click the image to go to the item on Amazon) is nice for the cake shoes because it offers a lot of interesting textures that could replicate different icing styles. If you’re looking for a more minimal investment and only the necessity, then this is my recommendation for a single knife Here.
Hot Glue Gun
This one is essential for The Reliquarian… I would say Hot Glue is a constant, every prop, every wardrobe piece, and everyone who has worked on the project has the burns to prove it. What’s worse it’s glue… it’s sticky, that’s kind of it’s purpose. So when it burns it keeps burning because you can’t get away from it. It’s no joke, I’ve gotten some nasty 2nd degree burns so proceed with caution. That said, click the image above and drop it in your cart if you don’t have one. I like this one for the separate nozzles and high/low temp settings. You can get them for less than $5.00 but you get what you pay for.
Glue Sticks
I buy these things by the CASE. We use them for everything… however if the idea of 430 gluesticks seems like overkill you can click the photo above for a more manageable count of 3o. If you are buying the glue gun I recommend you’re looking for 7/16th diameter gluesticks… Im not saying I’ve ever bought the wrong ones before but…. I’ve bought the wrong ones before.
Creating The Shoes
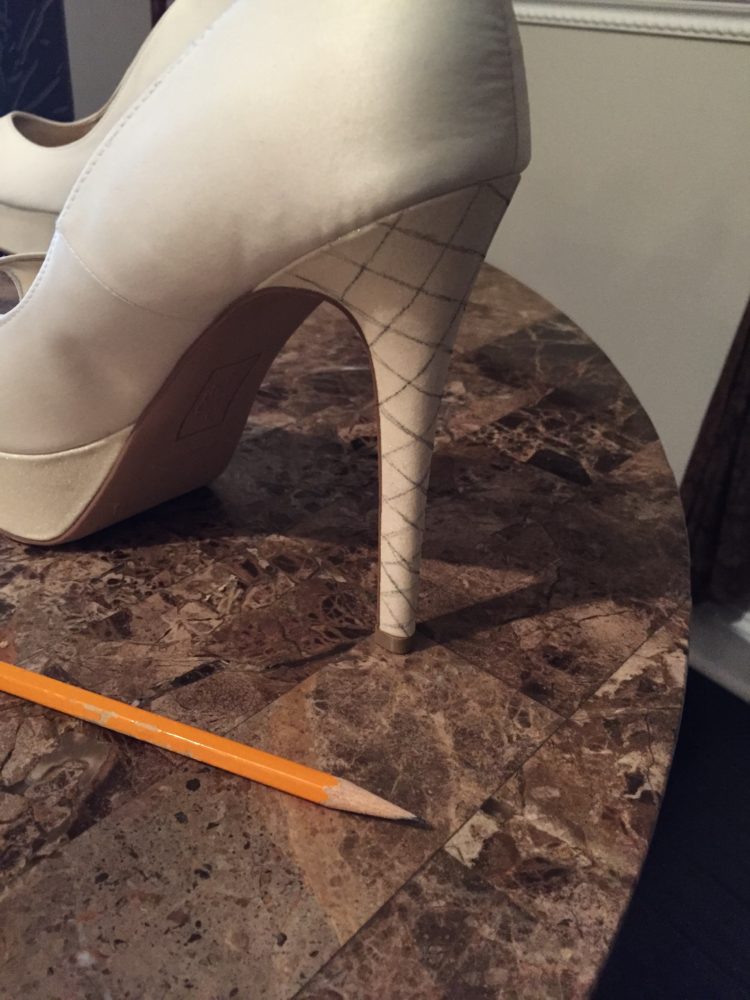
With your pencil, you want to draw a cross lattice pattern on the heel. Then divide the platform in half, it doesn’t need to be perfectly measured, or straight, it’s just a guide. In hindsight I wouldn’t use sketch pencils, I’d use the water color pencils in a close color match so I don’t have any bleed through or mixture with the paint.
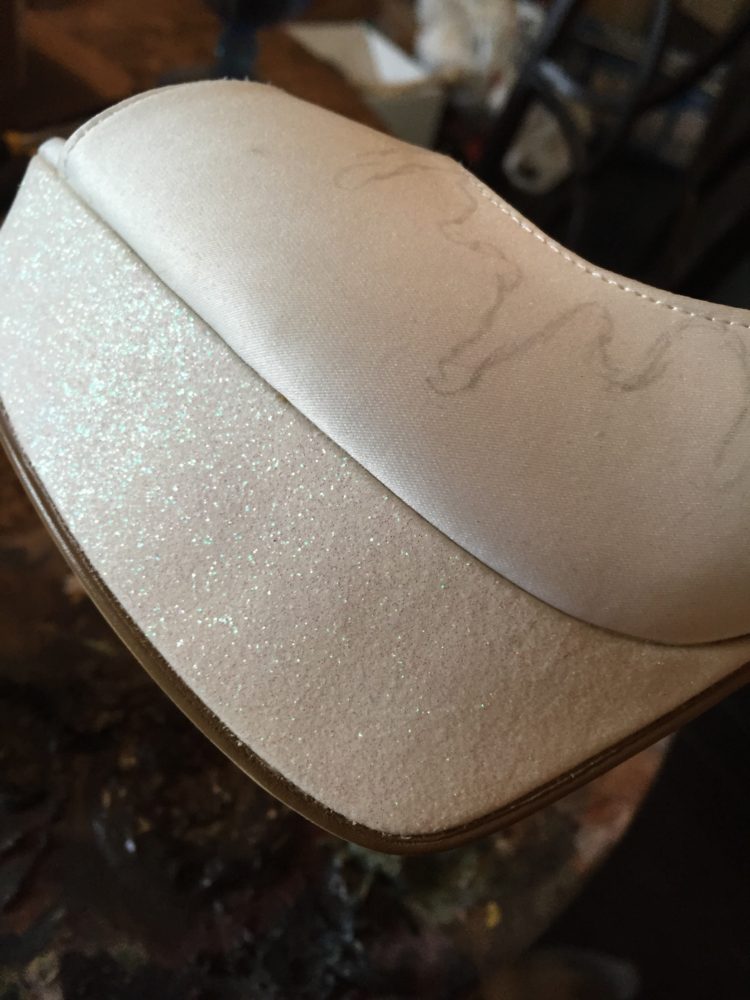
Along the top of your heel where your foot slides in you’ll draw a drippy pattern for the icing. It’s a rough sketch, and a guide line.
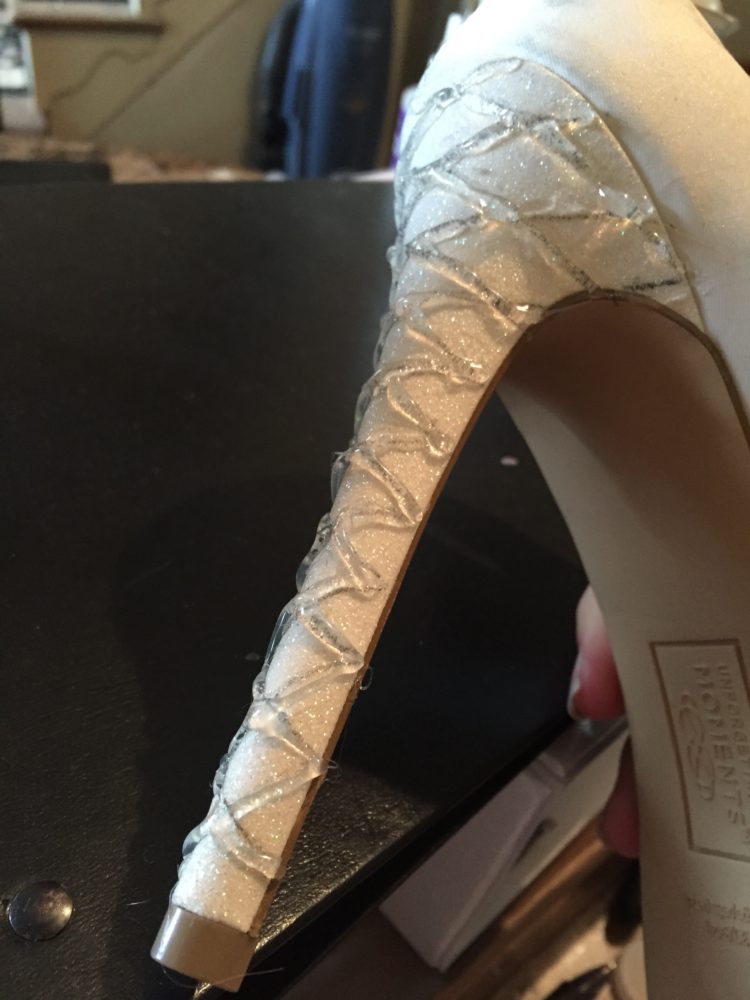
Taking a hot glue gun and trace over the lines you sketched out. You’ll also follow the outline of the icing you drew around the top of the shoe.
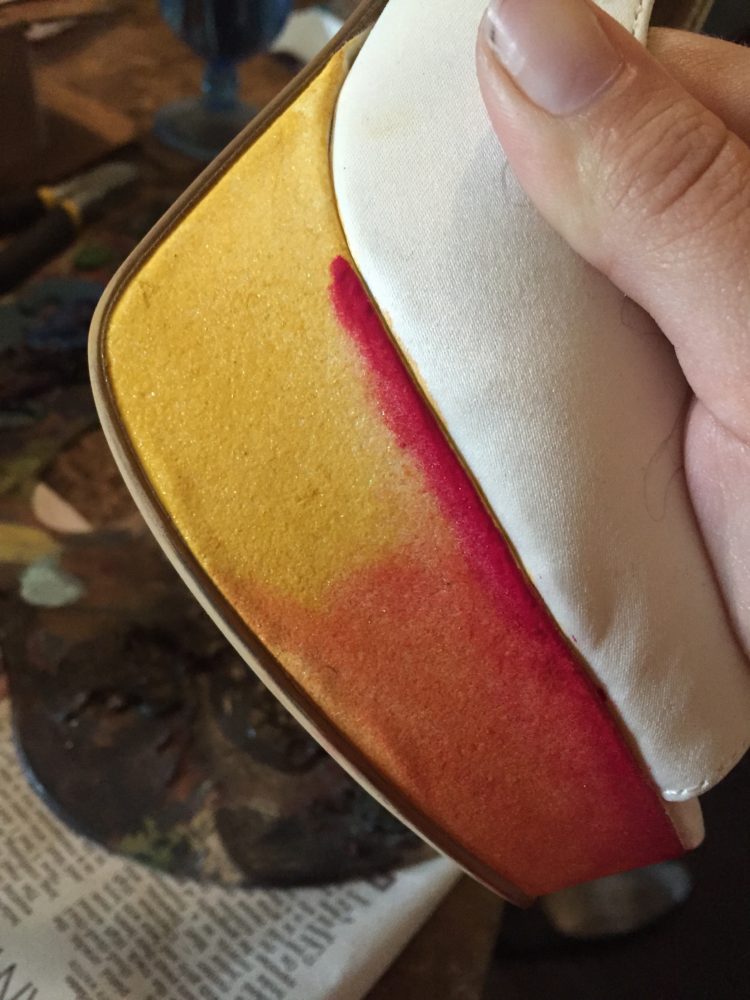
Taking a flat brush you’ll brush on a coat of the naples yellow to both the heel and the platform.
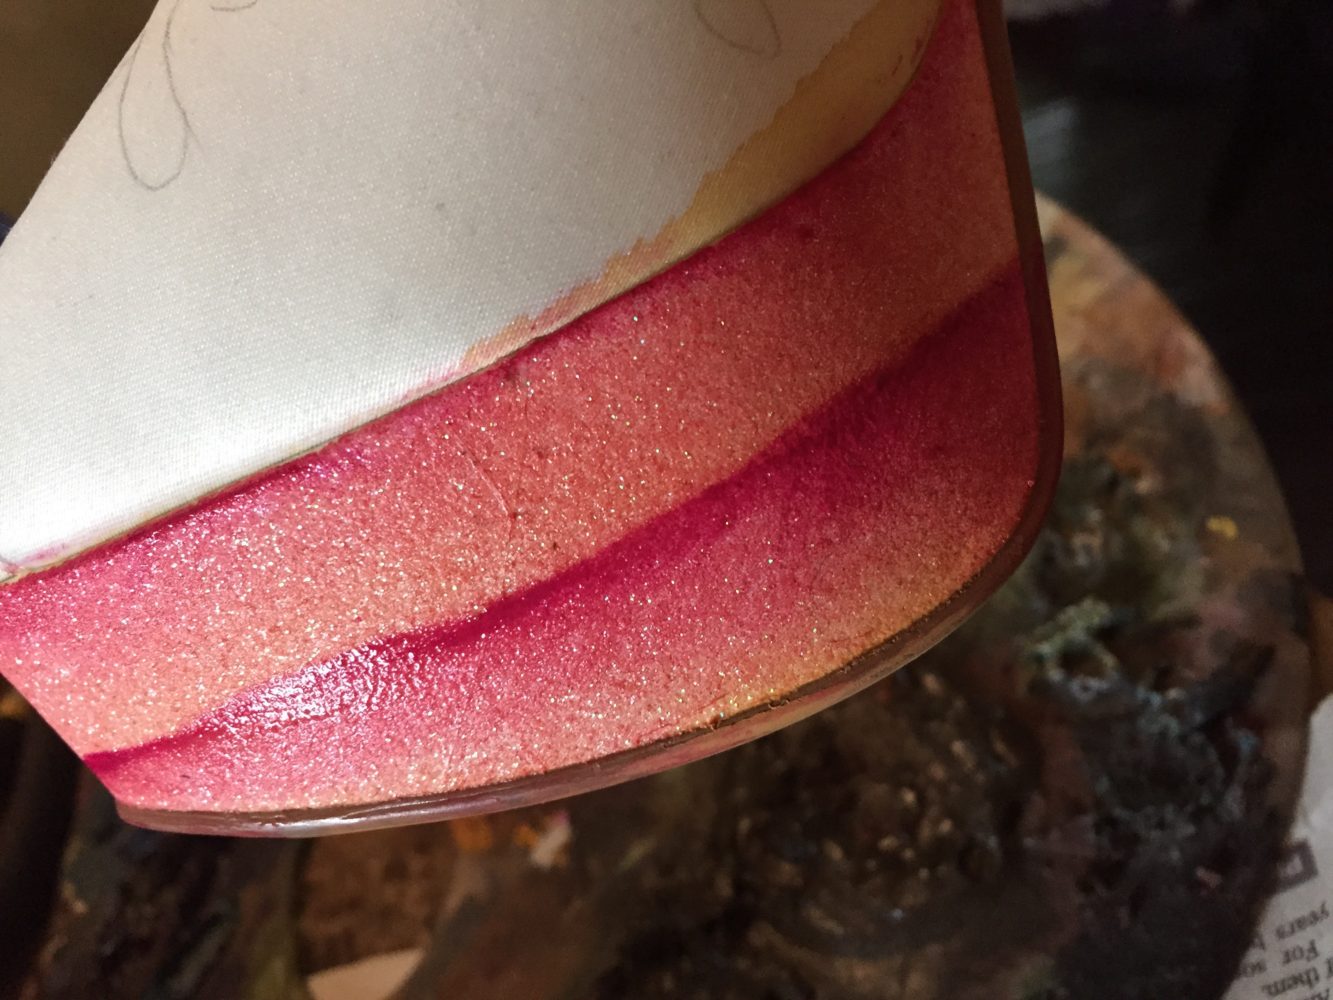
This is super easy, even if you aren’t an artist naturally. Shading sells everything. You begin with the Alizarin Crimson at the top of the platform. Mixing it with the Naples Yellow you’ll blend it down so it has a shaded look. At the halfway point you’ll do it again, beginning with the Crimson on top, the Naples on the bottom, and blending it into each other.
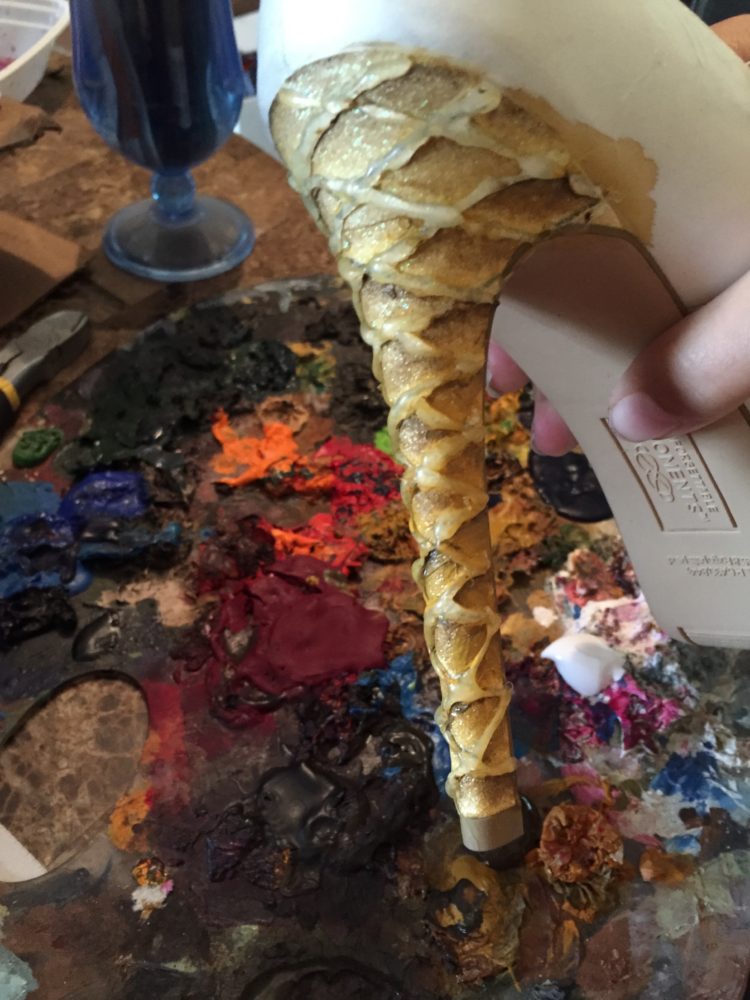
Shading is what really sells. Once the hot glue dries, take the Burnt Sienna and your smallest pointed brush. in the same fashion of shading, you’ll run lines of dark brown under the hot glue lines. Then blend with the naples yellow. A blend of the naples and siena becomes the mixture for on top of the hot glue.
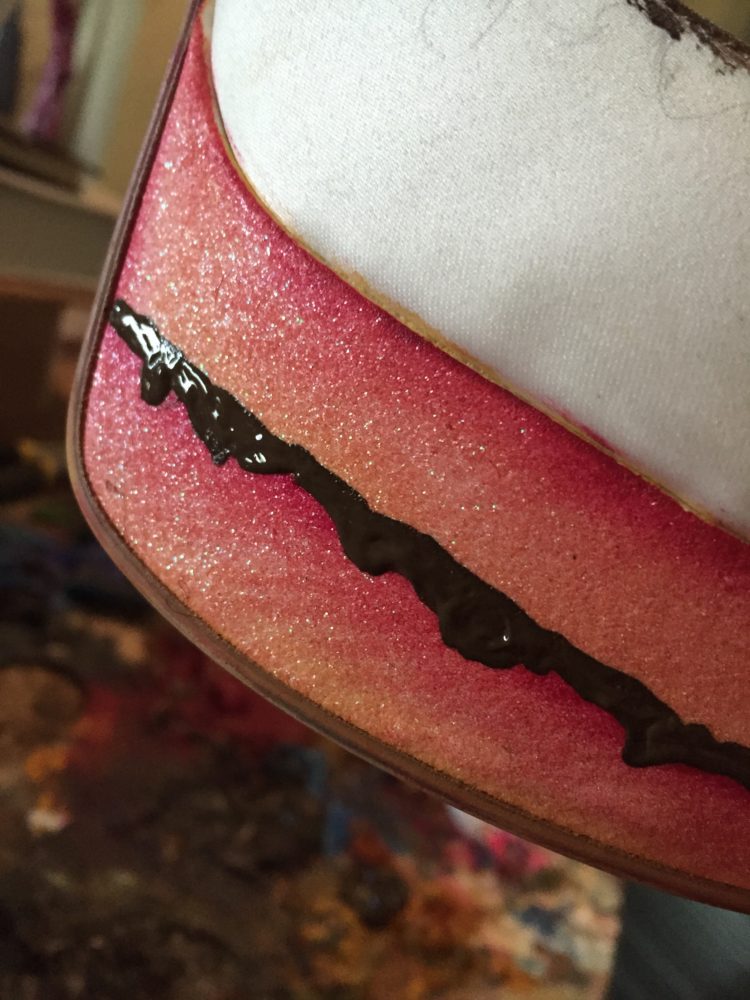
After the red velvet cake paint dries on the platform you can take some of the Burnt Sienna and create a line across the two layers. Add to the illusion by having it drip, I layer the paint pretty thick so it has not only the shape but the texture, it protrudes out from the platform.
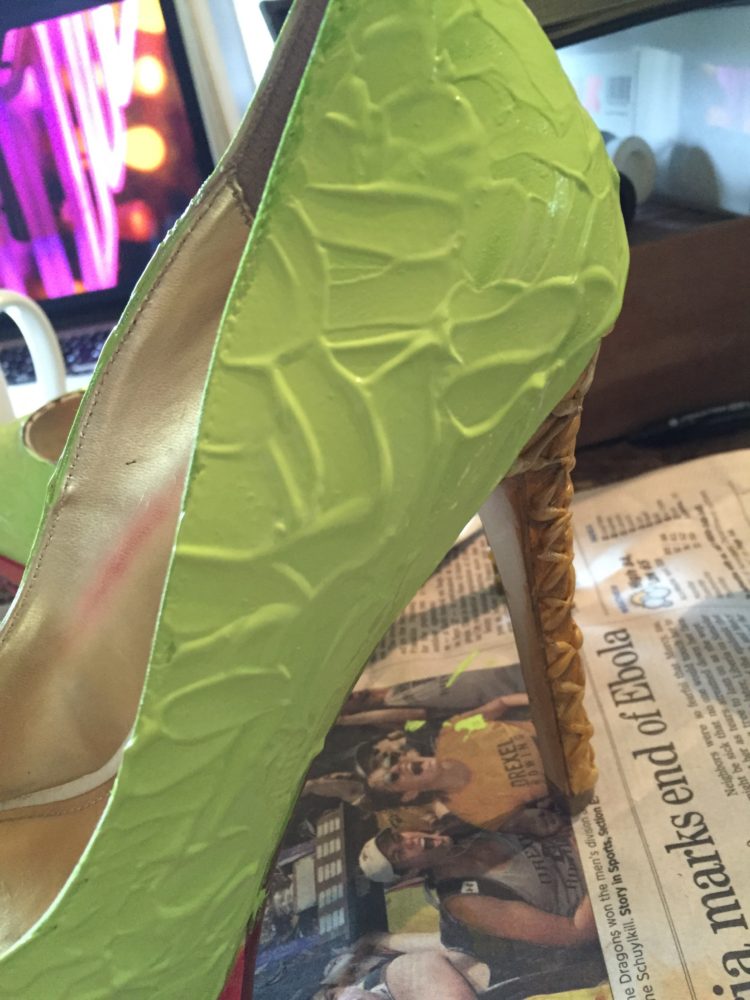
With your palette knife mix some of the Vivid Lime Green with some of the Titanium White and a touch of the Naples Yellow. There’s no specific measurements, its really just about blending it until it has the color you want. Use the wide brush to first brush a layer onto each shoe in it’s entirety. A little water helps it seep in and saturate the fabric, but will also make the color more translucent. Once your done with the base coat, get your palette knife and to a second coat, using the knife just as you would adding icing to a cake. You want the texture! It helps complete the illusion.

Taking your flat angled brush dip it in the Burnt Sienna and add small “chips” which are basically rectangle blocks here and there for the chocolate chips in the icing.
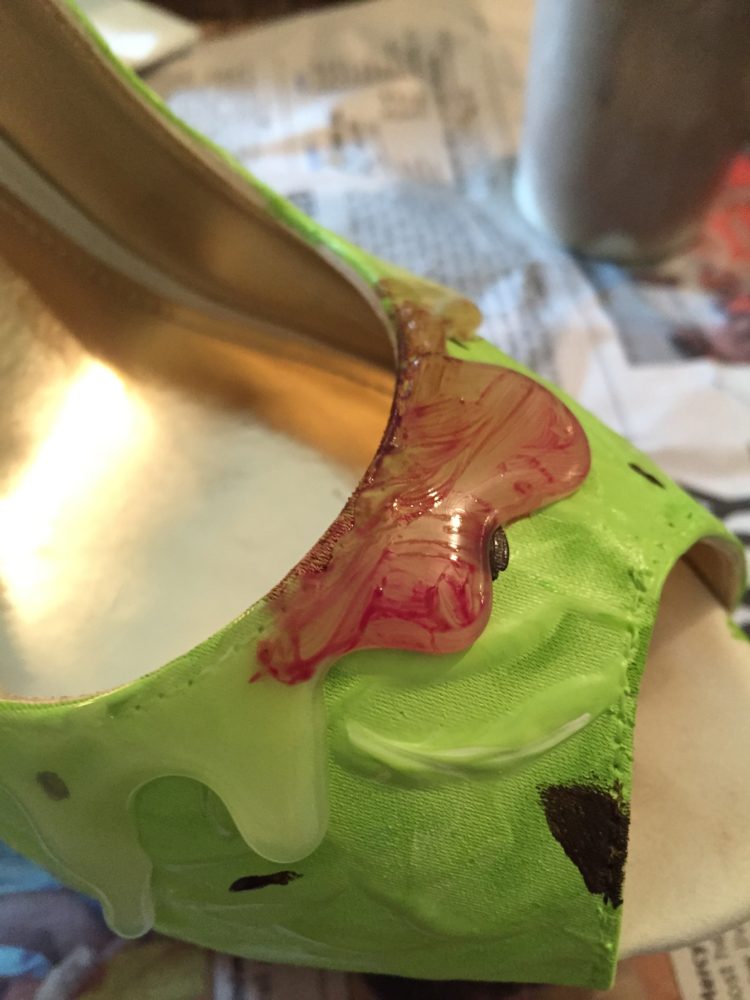
The final step is the icing around the top of the shoe. The hot glue creates a somewhat glossy surface so theres two ways you can go. With a wetter bristle you can create a more translucent gel kind of topping. The Alizarin Crimson would work nicely here. It takes a bit to get used to it and not leave streak marks from the brush strokes, the key is to do it with a light hand.
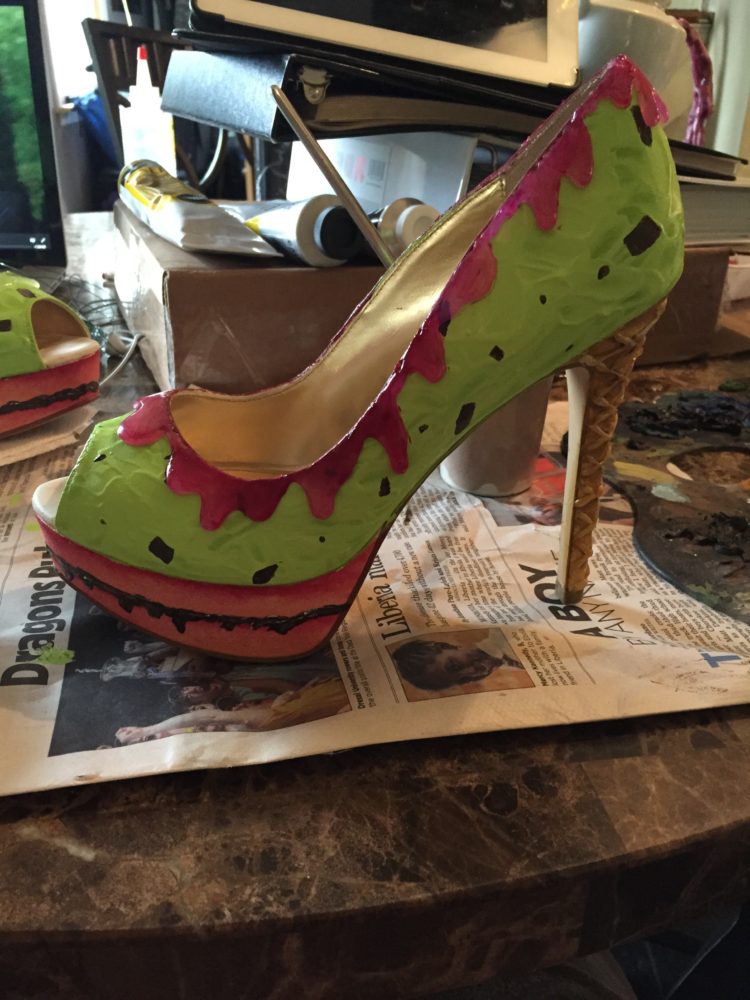
If you like that fruity gel icing look this is where you stop. All done!
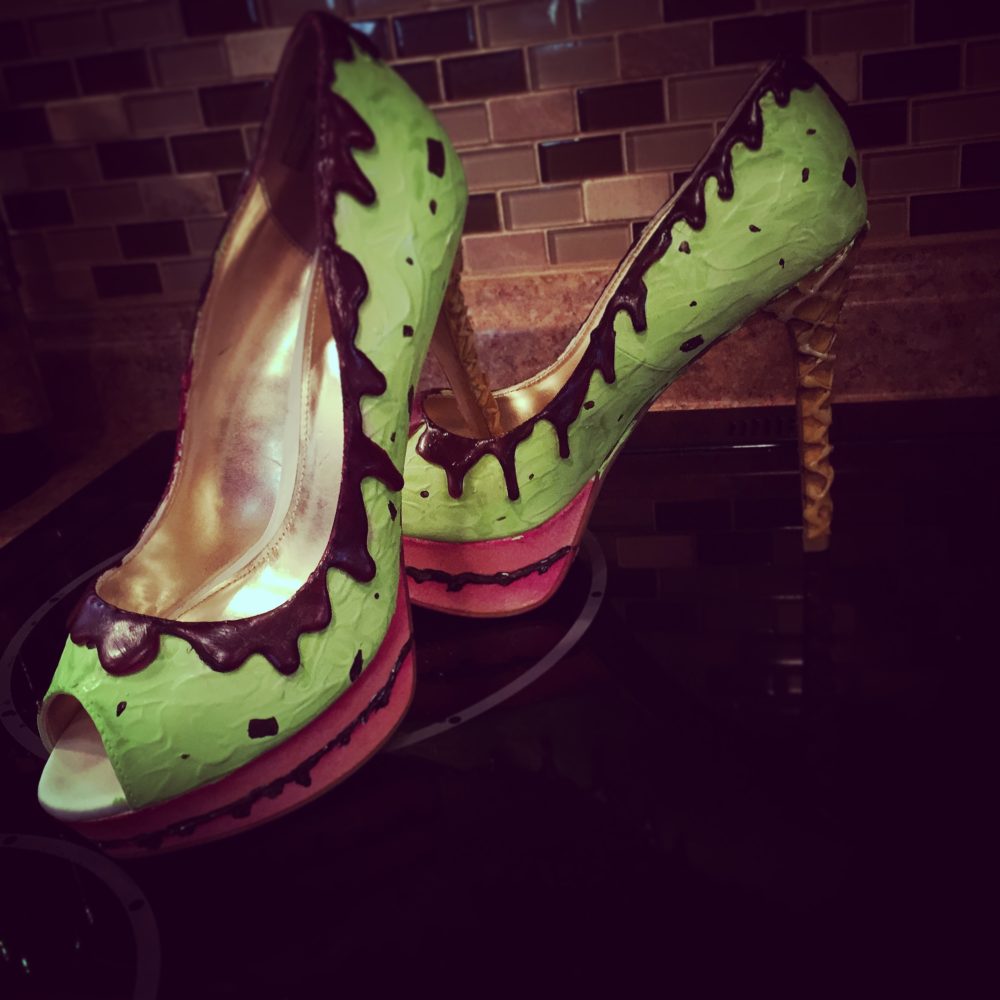
I ended up going with chocolate, because I knew the shot had a lot of information in it and I wanted people to see the details of the shoes. If you want a more thick and solid icing look you would simply give it a second coat after the first has dried. The first coat gives the second something to grip to and should make it easy to fill in the rest of the way.
Final Thoughts
The images above go directly to amazon, so you can price out what you need. We do affiliate link them all, so if you end up buying supplies from our links you donate a few cents of each purchase back to more Reliquarianing, and more tutorials. Please share photos with us of your creations! We’d love to see what you come up with! 🙂
If I link to a larger or bulk quantity on the photo it’s because we use that product often and it needs to be replaced frequently. I’ll also link to the minimum necessary for this specific project in the text below the image for convenience.
See something else in the Reliquarian you want a tutorial on? Just let us know in the comments and we’ll add it to the list! You can support the project further by going to www.Patreon.com/JessicaLark. Follow the project on social media at www.facebook.com/TheReliquarian, or www.Instagram.com/TheReliquarian
So now you have some Sweet Shoes! (see what I did there?!) and they were… wait for it… ‘A Piece of Cake’ to create! (Ok, I’m done with the cake puns now)


